Day 43: S3 Programmatic access with AWS-CLI 💻 📁
Hi, I am Pooja Bhavani, an enthusiastic DevOps Engineer with a focus on deploying production-ready applications, infrastructure automation, cloud-native technologies. With hands-on experience across DevOps Tools and AWS Cloud, I thrive on making infrastructure scalable, secure, and efficient. My journey into DevOps has been fueled by curiosity and a passion for solving real-world challenges through automation, cloud architecture, and seamless deployments. I enjoy working on projects that push boundaries whether it's building resilient systems, optimizing CI/CD pipelines, or exploring emerging technologies like Amazon Q and GenAI. I'm currently diving deeper into platform engineering and GitOps workflows, and I often share practical tutorials, insights, and use cases from my projects and experiences. ✨ Let’s connect, collaborate, and grow together in this ever-evolving DevOps world. Open to opportunities, ideas, and conversations that drive impactful tech!

S3
- Amazon Simple Storage Service (S3) offers a highly scalable and secure object storage solution for various data needs, including:
1 . Text file
2 . Image
3 . Video
4 . Backups & more!
Task-01
Launch an EC2 instance using the AWS Management Console and connect to it using Secure Shell (SSH).
Go to the AWS Management Console and navigate to EC2.
Click on "Launch Instance" and follow the steps to launch a new EC2 instance. Choose an appropriate AMI, instance type, and configure security groups to allow SSH access.
Once the instance is running, Open a terminal on your local machine.

Create an S3 bucket and upload a file to it using the AWS Management Console.
- Go to the S3 console in the AWS Management Console.

- Click on "Create bucket" and follow the prompts to create a new S3 bucket. Choose a unique name and the region where you want to create the bucket and rest of them keep default and click on create bucket.


- Once the bucket is created, click on it and then click on "Upload" to upload a file from your local machine to the bucket and click on upload.

Access the file from the EC2 instance using the AWS Command Line Interface (AWS CLI).
On the EC2 instance terminal, install the AWS CLI if it's not already installed:
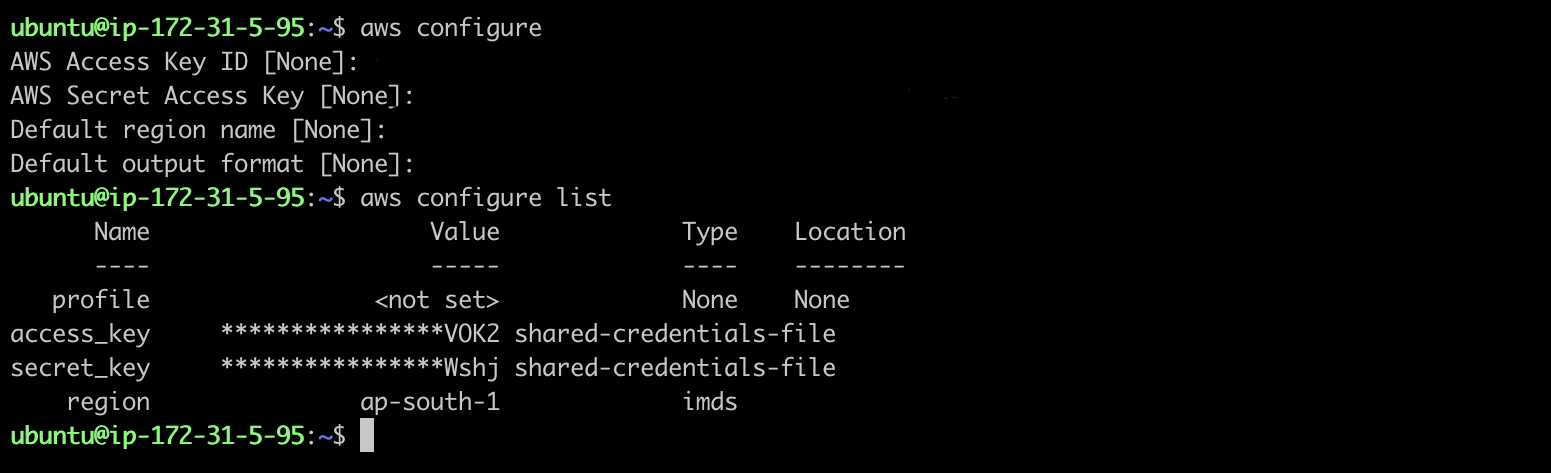
Configure the AWS CLI with your access key ID and secret access key using
aws configureas we did in the previous task. You can follow this Task to create a access key ID & secret access key Day-42.
sudo apt install curl -y
curl "https://awscli.amazonaws.com/awscli-exe-linux-x86_64.zip" -o "awscliv2.zip"
unzip awscliv2.zip
sudo ./aws/install
aws configure && aws configure list
- Check the list of s3 and use the
aws s3 cpcommand to copy the file from the S3 bucket to your EC2 instance:
aws s3 ls

aws s3 cp s3://<bucketname>/<content> /home/ubuntu
Task-02
Create a snapshot of the EC2 instance and use it to launch a new EC2 instance.
- Go to the EC2 dashboard and select the running instance and Click on "Actions" -> "Image and templates" -> "Create Image" to create a snapshot (AMI) of the instance.

- After that "create image" page will open there you have to create a image name, description and rest of them keep default and click on create image.

- Go to the AMIs section in the EC2 dashboard and select the snapshot you created and Click on "Launch instance for AMI" to launch a new EC2 instance from the snapshot.

- Follow the prompts to configure the instance details, such as instance type, AMI keep it as recent > recently created, security groups, and key pair and click on launch instance.

Download a file from the S3 bucket using the AWS CLI.
Connect to the new EC2 instance using SSH.
Install and configure the AWS CLI and configure as done previously with same Access key & Secret access key.
sudo apt-get update && sudo apt-get install awscli -y
aws configure
- Use the
aws s3 cpcommand to download the file from the S3 bucket to the new EC2 instance as you did in the task1.
aws s3 cp s3://<bucketname>/<content> /home/ubuntu

